
Industrial Safety Gear Checklist for Fall Protection Harness Use
For after-sales maintenance teams working at height, a fall protection harness is more than a compliance item—it is the final barrier between a routine service call and a serious incident.
This industrial safety gear checklist helps technicians quickly verify harness condition, fit, anchorage compatibility, and job-site readiness before climbing ladders, platforms, rooftops, or machinery.
By following a structured inspection process, maintenance personnel can reduce downtime, prevent avoidable injuries, and ensure every service task begins with dependable protection.
Start With the Real Question: Is This Harness Safe for Today’s Job?
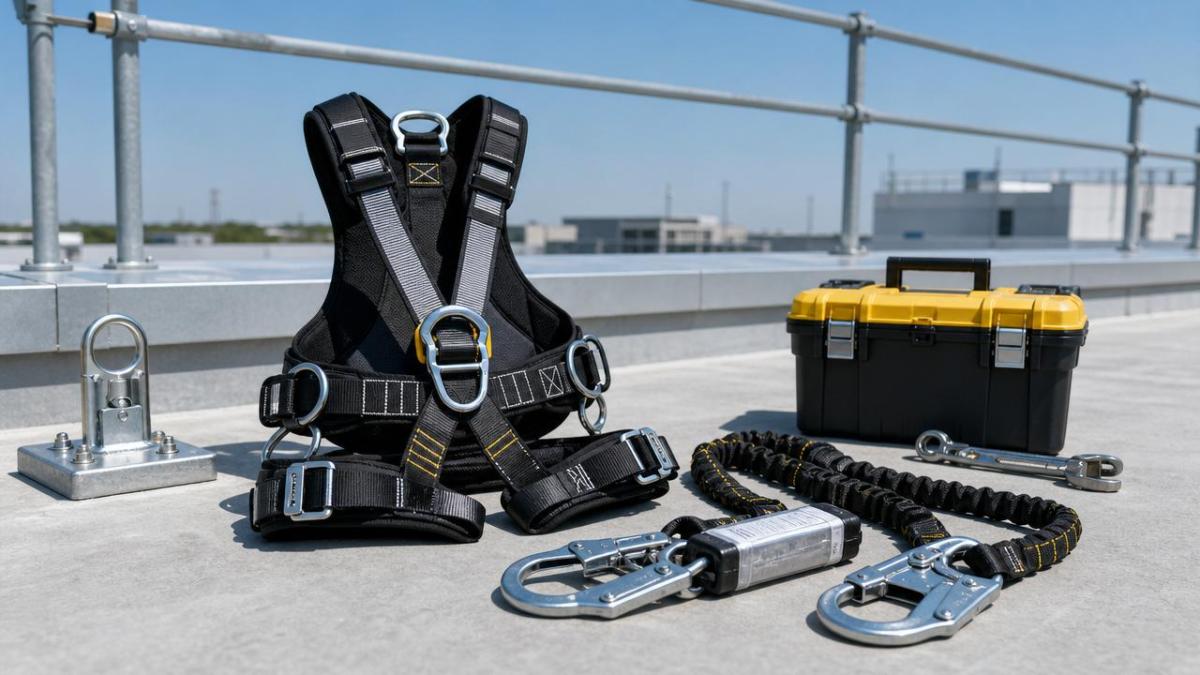
The most important question is not whether a harness is present, but whether it is suitable, inspected, correctly worn, and connected to a reliable system.
After-sales maintenance work often happens under time pressure, especially when customers are waiting for equipment to restart or building systems to resume operation.
That pressure can lead technicians to treat fall protection as a formality, yet small shortcuts create serious exposure during climbing, troubleshooting, or component replacement.
A practical checklist gives field teams a repeatable decision process before anyone leaves the ground, opens a roof hatch, or enters an elevated service area.
The goal is simple: confirm that every part of the fall protection setup can perform under real conditions, not just pass a visual glance.
Pre-Job Assessment: Know the Height, Surface, and Fall Risk
Before inspecting the harness itself, technicians should understand where the work will happen and how a fall could realistically occur.
Common after-sales maintenance locations include rooftop HVAC units, industrial mezzanines, conveyor platforms, warehouse racking, lighting structures, silos, and elevated machine frames.
Each location creates different risks, including unprotected edges, fragile surfaces, slippery access routes, moving machinery, electrical hazards, and limited rescue access.
The checklist should confirm the work height, walking surface condition, anchor location, fall clearance, swing-fall possibility, and expected body position during the task.
If a technician must lean, reach, crouch, or carry tools, the harness setup must support those movements without loosening or creating snagging hazards.
Maintenance teams should also check weather, lighting, noise, chemical exposure, and customer-site restrictions before choosing final industrial safety gear for the job.
Harness Label and Certification Check
Every harness inspection should begin with the label because it identifies the manufacturer, model, size, standard, serial number, and service limitations.
If the label is missing, unreadable, cut, painted over, or chemically damaged, the harness should be removed from service immediately.
Technicians should verify that the harness meets the applicable regional standard required by the company, customer site, or local regulation.
Depending on the market, relevant references may include OSHA, ANSI, CSA, EN, or other recognized fall protection requirements.
The user weight range must also match the technician, clothing, tools, and carried equipment, not only the person’s body weight.
A harness that is certified but overloaded, expired, or outside manufacturer instructions is not acceptable industrial safety gear for elevated maintenance.
Webbing Inspection: Cuts, Burns, Abrasion, and Chemical Damage
Webbing is the main load-bearing structure of the harness, so technicians should inspect every strap slowly with both eyes and hands.
Look for cuts, fraying, broken fibers, pulled stitches, melted areas, hard spots, discoloration, excessive dirt, paint, oil, or chemical contamination.
Run the webbing through your fingers and bend it slightly, because hidden cracks or stiffness may appear only when the material flexes.
Pay close attention to areas near buckles, D-rings, adjustment points, shoulder straps, leg loops, and waist support sections.
Heat damage from welding, grinding sparks, hot exhaust, or electrical cabinets can weaken fibers even when the harness still looks usable.
If webbing damage is found, do not repair it with tape, stitching, glue, or field improvisation; quarantine the harness for competent evaluation.
Stitching and Load Indicators
Stitching holds key harness components together and must be treated as a critical safety feature, not a cosmetic detail.
Inspect all stitch patterns for broken threads, loose ends, pulled seams, missing bar tacks, faded thread, or unusual separation between layers.
Many harnesses include fall arrest indicators designed to deploy, tear, or reveal warning marks after a fall event.
If any indicator shows activation, the harness must be removed from service, even if the technician believes the fall was minor.
After-sales personnel should never continue using a harness involved in a fall until it has been handled according to company procedures.
When in doubt, tag the equipment, document the concern, and replace it rather than risking failure during the next climb.
Hardware Check: D-Rings, Buckles, Grommets, and Adjusters
Metal and plastic hardware should be inspected for cracks, deformation, sharp edges, corrosion, excessive wear, and improper movement.
The dorsal D-ring must sit securely, move as designed, and show no bending, pitting, weld damage, or abnormal opening.
Buckles should engage smoothly, lock positively, and release only when operated intentionally according to the manufacturer’s instructions.
Pass-through, tongue, quick-connect, and friction buckles each require different checks, so technicians should know the exact design they use.
Grommets must not be stretched, torn, cracked, or pulled away from the surrounding webbing, especially on frequently adjusted leg straps.
If hardware feels sticky, loose, misaligned, or difficult to close, do not force it; remove the harness until the issue is resolved.
Fit Check: A Safe Harness Must Fit the Technician
A harness that passes inspection can still be unsafe if it does not fit the technician’s body and work clothing properly.
After-sales maintenance may involve winter jackets, rainwear, tool belts, or arc-rated clothing, which can change harness adjustment significantly.
The dorsal D-ring should rest between the shoulder blades, not high on the neck or low on the back.
Shoulder straps should lie flat without twisting, crossing incorrectly, or pulling the chest strap into the throat area.
Leg straps should be snug enough to prevent sliding but not so tight that they restrict circulation or movement.
A practical test is to place a flat hand under the strap; excessive space indicates poor adjustment and possible dangerous loading.
Technicians should complete a buddy check whenever possible, because twisted rear straps and misplaced D-rings are difficult to see alone.
Lanyard, SRL, and Connector Compatibility
A harness is only one part of the fall protection system; the lanyard, self-retracting lifeline, connector, and anchor must work together.
Check that hooks, carabiners, and connectors are compatible with the D-ring and anchor point, without side loading or gate interference.
Connectors should be self-closing and self-locking, and their gates must operate smoothly without dirt, rust, or spring weakness.
Shock-absorbing lanyards must be inspected for tears, deployed energy absorbers, damaged labels, cut webbing, and incorrect length.
Self-retracting lifelines should retract fully, lock when pulled sharply, and show no cable, webbing, housing, or swivel damage.
Never connect two incompatible components simply because they physically fit; compatibility depends on how they behave under load.
Anchor Point Verification Before Climbing
Many incidents happen because technicians connect excellent industrial safety gear to an anchor that was never designed for fall arrest.
An acceptable anchor must meet the required strength rating, be positioned correctly, and be approved for the intended fall protection application.
Do not connect to guardrails, conduit, pipe supports, cable trays, ladder rungs, light brackets, or machine parts unless formally rated.
The best anchor is usually above the worker, reducing free fall distance and limiting dangerous swing toward walls, beams, or machinery.
If the only available anchor is low, distant, or questionable, stop and request a proper solution before beginning the task.
For recurring service sites, companies should document approved anchor locations and provide technicians with site-specific fall protection instructions.
Fall Clearance and Swing-Fall Calculation
Fall clearance is often misunderstood, yet it determines whether the system prevents ground impact or only slows the fall too late.
Technicians should account for lanyard length, energy absorber deployment, harness stretch, D-ring shift, worker height, and safety margin.
Self-retracting lifelines can reduce clearance requirements, but only when used within the manufacturer’s angle, edge, and anchorage limitations.
Swing fall occurs when the anchor is not directly above the worker, causing the person to arc sideways after falling.
That swing can drive the technician into steel frames, roof units, racking, rotating equipment, or nearby walls.
If clearance or swing fall cannot be controlled, reassess the work method, choose another anchor, or use a different access system.
Tool Control and Work Positioning
After-sales maintenance involves tools, replacement parts, meters, fasteners, batteries, and diagnostic devices that can create secondary hazards at height.
Use tool lanyards, tether points, pouches, and controlled lifting methods to prevent dropped objects from injuring people below.
However, tool lanyards should never be attached in a way that interferes with harness buckles, fall arrest points, or connector operation.
If the task requires two hands for repair, work positioning equipment may be necessary, but it does not replace fall arrest protection.
Technicians should distinguish between fall restraint, work positioning, and fall arrest because each system has different components and limitations.
When the job requires extended leaning or suspended access, involve a competent person before relying on a standard harness setup.
Site Communication and Rescue Readiness
A fall protection plan is incomplete if no one knows how to respond after a fall occurs.
Suspension trauma can develop quickly, and a suspended technician may be unable to self-rescue after shock, injury, or disorientation.
Before work begins, confirm who is monitoring the task, how help will be called, and what rescue equipment is available.
Do not assume the local fire department can perform a rapid technical rescue at every industrial or commercial site.
Maintenance teams should carry communication devices suitable for the environment, especially on rooftops, basements, remote yards, or noisy plants.
A good checklist includes emergency contacts, access routes, rescue method, first-aid availability, and customer-site reporting requirements.
Storage, Cleaning, and Service Life
Harness life depends heavily on storage and handling between jobs, especially for technicians who travel between customer sites.
Store harnesses in clean, dry, ventilated bags or lockers, away from sunlight, sharp tools, chemicals, batteries, and vehicle oil.
Do not leave fall protection equipment loose in a service van where it can be crushed by parts or contaminated by fluids.
Clean the harness only according to manufacturer instructions, usually with mild soap, water, and air drying away from direct heat.
Never use harsh solvents, pressure washing, bleach, or uncontrolled heat because they can weaken webbing and stitching.
Track the date of first use, inspection records, incidents, repairs, and retirement decisions in a simple but reliable system.
Quick Field Checklist for Maintenance Technicians
Before climbing, confirm the work location, height exposure, surface condition, weather, lighting, customer restrictions, and rescue access.
Inspect the harness label, certification, size, weight rating, service life, serial number, and manufacturer instructions.
Check webbing for cuts, fraying, burns, stiffness, discoloration, chemical damage, paint contamination, and excessive abrasion.
Inspect stitching, fall indicators, D-rings, buckles, adjusters, grommets, and all hardware movement before putting the harness on.
Fit the harness correctly, remove twists, tighten straps evenly, position the dorsal D-ring, and complete a buddy check.
Verify lanyard or SRL condition, connector locking action, anchor approval, fall clearance, swing-fall control, and tool tethering.
Confirm communication, emergency contacts, rescue method, and stop-work authority before beginning any elevated maintenance task.
When to Remove a Harness From Service
A harness should be removed from service after any fall arrest event, even when visible damage appears minimal.
It should also be retired if labels are unreadable, inspection history is unknown, or manufacturer service limits have been exceeded.
Remove equipment with damaged webbing, failed stitching, activated indicators, deformed hardware, corrosion, chemical exposure, or questionable contamination.
Technicians should not debate damaged fall protection at the edge of a roof or while a customer is waiting.
The safest rule is clear: if the harness cannot be confidently verified, it should not be used for work at height.
Building a Better After-Sales Safety Routine
For service organizations, a harness checklist works best when it is part of a larger field maintenance routine.
Teams should standardize equipment kits, inspection forms, training intervals, van storage, replacement stock, and escalation procedures.
Supervisors can reduce delays by ensuring technicians have compatible anchors, lanyards, SRLs, helmets, gloves, and site access documentation.
Digital inspection logs can also help track recurring damage patterns, overdue equipment, and technicians who need refresher training.
Customers benefit too, because safer maintenance reduces interruption, liability exposure, incident investigations, and unplanned service delays.
In this sense, industrial safety gear is not only protective equipment; it is part of professional service reliability.
Conclusion: A Harness Checklist Turns Safety Into a Repeatable Decision
Fall protection should never depend on memory, speed, or confidence alone, especially during after-sales maintenance at unfamiliar sites.
A structured checklist helps technicians confirm harness condition, correct fit, compatible connections, reliable anchorage, sufficient clearance, and realistic rescue planning.
The strongest safety culture is practical: inspect before climbing, stop when uncertain, document concerns, and replace questionable equipment without hesitation.
When every service call begins with this discipline, fall protection becomes more than compliance—it becomes dependable industrial safety gear that protects skilled people.