
Search News
Industry Portal
Hot Articles
Do dimmable LED grow lights reduce electricity use at lower settings?
Time
Click Count
Do Dimmable LED Grow Lights Reduce Electricity Use at Lower Settings?
Do dimmable LED grow lights reduce electricity use at lower settings? Usually, yes. Reducing the dimmer setting lowers the fixture’s power draw, light output, and heat production.
However, the savings are not always perfectly proportional. Driver design, dimming method, fixture quality, and daily operating hours determine how much electricity a home grower actually saves.
For most consumers, dimmable LED grow lights are useful because they let plants receive only the light intensity needed at each growth stage.
Lower Dimmer Settings Usually Mean Lower Wattage
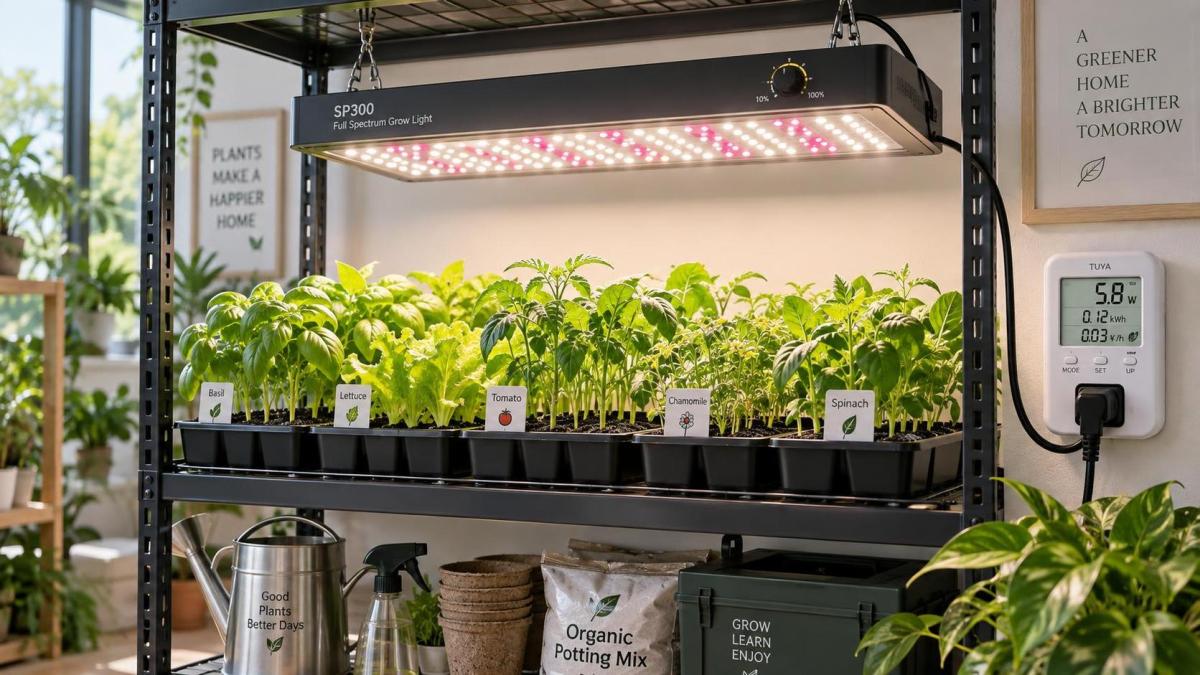
A dimmable LED grow light does not simply block or waste unused electricity when you lower its setting. It normally reduces the electrical power delivered to LEDs.
For example, a fixture drawing 200 watts at full output may draw roughly 100 watts when dimmed to 50 percent. Exact results vary between models.
The dimmer controls the LED driver, which regulates current supplied to the light-emitting diodes. Less current generally means fewer watts consumed from the wall outlet.
That means a grower running a 200-watt light at half power for twelve hours uses less electricity than operating it at maximum output.
At full output, that fixture would use approximately 2.4 kilowatt-hours daily. At a true 100-watt setting, it would use about 1.2 kilowatt-hours daily.
The difference may appear small during one day, but consistent dimming can create meaningful savings over a month, season, or full indoor growing year.
Electricity savings are especially valuable for gardeners operating several fixtures, maintaining long photoperiods, or growing in regions with high residential energy prices.
Still, treat the dimmer label as an approximate guide until you confirm actual consumption with a plug-in power meter or manufacturer wattage chart.
Why Electricity Savings Are Not Always Exactly Linear
Many people assume a 50 percent dimmer position always means exactly 50 percent energy use. In practice, dimming performance depends on the driver and fixture electronics.
High-quality dimmable LED grow lights often provide relatively predictable reductions in wattage. Lower-cost fixtures may have less accurate dimmer scales or inefficient low-output behavior.
The driver itself consumes a small amount of electricity to regulate voltage and current. That fixed overhead can make very low settings slightly less efficient.
For instance, a fixture may consume 110 watts at a marked 50 percent setting rather than exactly 100 watts. This is normal and not necessarily defective.
Some lights use a continuously adjustable knob, while others use stepped settings or external controllers. Each system can produce slightly different power-consumption patterns.
Fans, digital displays, wireless controls, and onboard sensors can also continue using modest power even when the LEDs are heavily dimmed.
These differences do not eliminate the value of dimming. They simply mean consumers should compare actual wattage instead of relying entirely on printed percentages.
A basic outlet watt meter is one of the most practical tools for checking whether a particular grow light delivers the savings promised by its dimmer.
How to Calculate Your Likely Energy Cost Savings
You do not need complicated electrical knowledge to estimate the operating cost of dimmable LED grow lights. Start with actual watts, daily hours, and local electricity rates.
First, divide the fixture’s wattage by 1,000 to convert watts into kilowatts. Then multiply that number by hours of operation each day.
Multiply daily kilowatt-hours by your electricity price. Finally, multiply the result by thirty days to estimate the approximate monthly lighting cost.
Imagine a 300-watt grow light running eighteen hours daily. It uses 5.4 kilowatt-hours per day, or about 162 kilowatt-hours during a thirty-day month.
At an electricity rate of $0.16 per kilowatt-hour, that schedule costs approximately $25.92 monthly. The total excludes ventilation, heating, and other equipment.
If the same light is dimmed to a measured 180 watts, daily consumption drops to 3.24 kilowatt-hours. Monthly usage becomes about 97.2 kilowatt-hours.
At the same utility rate, the dimmed fixture costs about $15.55 monthly. That is a monthly lighting reduction of roughly $10.37 for one light.
Your real savings depend on measured wattage and operating habits. A larger reduction occurs when plants can thrive under lower intensity for extended periods.
Do Plants Still Grow Well Under Dimmed LED Light?
Lower electricity use only helps if plant growth remains healthy. The goal is not to use the lowest possible setting, but to match light intensity with plant needs.
Seedlings, cuttings, and newly transplanted plants generally need less light than mature flowering plants. Running a powerful fixture at full output can overwhelm these stages.
Young plants may show leaf bleaching, curling, slowed growth, or dry edges when exposed to intense light too closely. Dimming often prevents these avoidable problems.
Vegetative plants usually need more light than seedlings, but their requirements still vary by crop, growing area, nutrient availability, temperature, and carbon dioxide conditions.
Flowering and fruiting plants often benefit from higher intensity, although maximum output is not automatically necessary. Canopy coverage and hanging height matter substantially.
A dimmer gives home growers a practical way to increase intensity gradually as plants establish roots, develop leaves, and become capable of using more light.
This staged approach can improve consistency because it reduces the temptation to raise lights too high merely to avoid excessive intensity near the canopy.
Rather than asking whether full power is best, ask whether your plants receive enough useful light for their current growth stage and cultivation goals.
Use PPFD and DLI Instead of Guessing From Wattage
Wattage measures electricity consumption, not the amount of plant-usable light reaching leaves. For better decisions, understand PPFD and daily light integral, commonly called DLI.
PPFD measures photosynthetic photon flux density at a specific location. It describes how many plant-usable light particles reach one square meter each second.
DLI combines light intensity with operating time. A moderately dimmed fixture running longer can sometimes provide similar daily light exposure to a brighter fixture.
For example, reducing intensity from excessive levels may preserve plant health without reducing useful growth. Extra light does not help when another factor limits photosynthesis.
Nutrients, root health, watering practices, airflow, temperature, and genetics all influence how efficiently plants use the light provided by a grow fixture.
A PAR meter offers the most direct way to assess PPFD, but consumers can also use manufacturer maps, reputable reviews, and plant-response observations.
Measure or estimate light at several canopy positions, not only directly beneath the fixture. Edge areas often receive much less intensity than the center.
When dimming reduces hotspots while maintaining adequate coverage, it can improve overall growing conditions and reduce electricity use at the same time.
When Dimming Makes the Most Financial Sense
Dimming delivers the strongest financial benefit when a grow light is oversized for the current space, plant stage, or crop. Oversizing is common in small home setups.
A powerful light may be purchased for future expansion, flowering performance, or better coverage. Until those conditions apply, lower settings can avoid unnecessary energy use.
Growers also save money when plants require shorter canopies, smaller containers, or limited light exposure. Not every herb, leafy green, or houseplant needs high intensity.
Propagation trays are another ideal application. Seedlings and clones often need gentle, uniform lighting, making a dimmed fixture more efficient than a full-power setup.
Seasonal schedules can matter too. Plants near a bright window may need supplemental light during winter but less artificial intensity during sunnier periods.
Dimming can also reduce cooling demands. LEDs generate less heat at reduced wattage, so tents, shelves, and enclosed rooms may require less fan operation.
That secondary energy benefit varies by climate and setup. In warm rooms, reducing heat can be valuable; in cold rooms, supplemental heat may be needed.
For a simple indoor garden, the best economic result usually comes from selecting an appropriately sized fixture and dimming it only when plant demand is lower.
How to Dim a Grow Light Without Hurting Results
Begin at a conservative setting after germination, transplanting, or introducing a new light. Let plants adapt before making large changes in intensity or distance.
Check leaf color, leaf angle, growth speed, and moisture needs over several days. Healthy plants generally look balanced rather than stressed or excessively stretched.
If stems become long and weak, plants may need more light. Increase dimmer output gradually, lower the fixture carefully, or extend the daily lighting schedule.
If upper leaves bleach, curl upward, develop dry margins, or show unusual stress, reduce intensity or increase the distance between light and canopy.
Adjust only one major variable at a time whenever possible. Changing dimmer position, hanging height, feeding strength, and watering simultaneously makes diagnosis harder.
Use a timer so the photoperiod remains consistent. Dimming changes intensity, while a timer controls duration; both affect total daily light received by plants.
Keep the fixture clean and ensure ventilation openings remain unobstructed. Dust buildup and overheating can reduce light output, efficiency, and driver lifespan.
Record the dimmer setting, hanging height, plant stage, and schedule. Simple notes help identify productive settings and prevent repeated trial-and-error costs.
What to Check Before Buying Dimmable LED Grow Lights
Look beyond a large advertised wattage number. Reputable manufacturers clearly list actual wall power draw, dimming range, recommended coverage, and hanging-height guidance.
Choose fixtures with a genuine dimmer or compatible external controller. Verify that the product can reduce output smoothly and does not only offer basic on-off operation.
Check whether the manufacturer publishes PPFD maps at multiple mounting heights. Useful maps show center and edge readings across the recommended growing area.
Driver quality matters because it affects reliability, power efficiency, dimming behavior, and heat management. Established component brands can be a positive signal.
Consider fixture efficacy, commonly expressed as micromoles per joule. Higher efficacy means more plant-usable photons are produced from each unit of electrical energy.
Do not assume the highest efficacy fixture is automatically best for every consumer. Coverage, plant type, room constraints, warranty, and budget still matter.
A detachable or remote-mounted driver can be useful in warm tents because it allows some heat-producing electronics to sit outside the growing environment.
Finally, read independent measurements when available. Reviews using watt meters and PAR meters can reveal whether published specifications match real-world performance.
Common Misunderstandings About Dimming and Power Use
One common misconception is that dimming damages LEDs. Quality LED grow lights are designed for normal dimmer use, provided they are operated within manufacturer instructions.
Another misconception is that a dimmed light always delivers lower efficiency. Efficiency may vary slightly, but reduced output usually still means significantly lower total electricity use.
Some growers believe maximum intensity always produces maximum yields. Plants have limits, and excessive light can create stress when nutrition, temperature, or carbon dioxide are inadequate.
It is also incorrect to judge grow-light performance from visible brightness alone. Human vision responds differently to light than plant photosynthesis does.
A light that appears extremely bright may not necessarily deliver the best canopy distribution. Even spread can be more useful than an intense central hotspot.
Finally, lowering the dimmer does not replace proper fixture sizing. A very large fixture operated at minimum power may still provide uneven coverage or unnecessary upfront cost.
Final Answer: Is Dimming Worth Using?
Yes, dimmable LED grow lights generally reduce electricity use at lower settings because the LEDs receive less electrical power. Actual savings should be verified through measured wattage.
For home growers, dimming is most valuable when plants are young, light demand is limited, the fixture is oversized, or heat management is difficult.
The most effective approach is to set intensity according to plant stage, canopy coverage, and observed health instead of leaving the grow light at maximum output.
Use a timer, monitor plant response, and measure wall consumption when possible. These steps turn dimming from a convenience feature into a practical energy-management tool.
Ultimately, the best setting is not the lowest one or the brightest one. It is the level that provides healthy growth while avoiding wasted electricity and excess heat.
Recommended News